
Summary - One of the benefits of Klipfolio's partner program is that you get access to the client management tool. This tool is designed to help you set up dashboards for clients and manage client accounts. Check out this post to see these steps in action.
If you're a Klipfolio partner, you have access to the client management tool in your master/parent account. Use this section to add and remove clients, set up and manage dashboards, and control branding options.
Scenario: New client
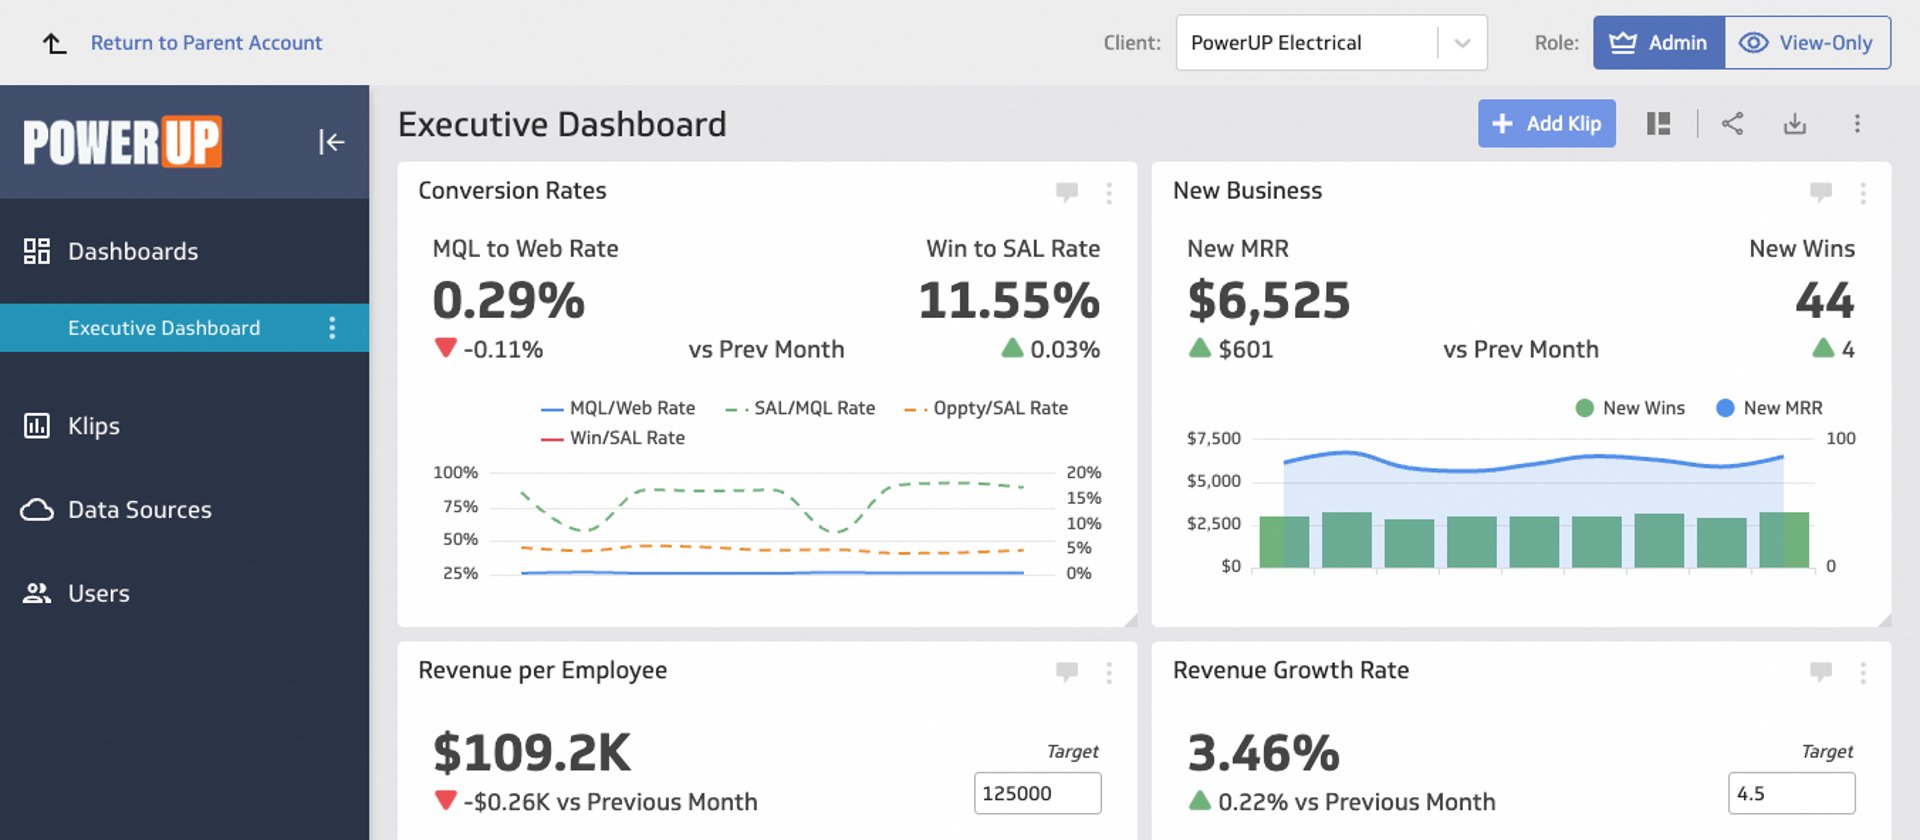
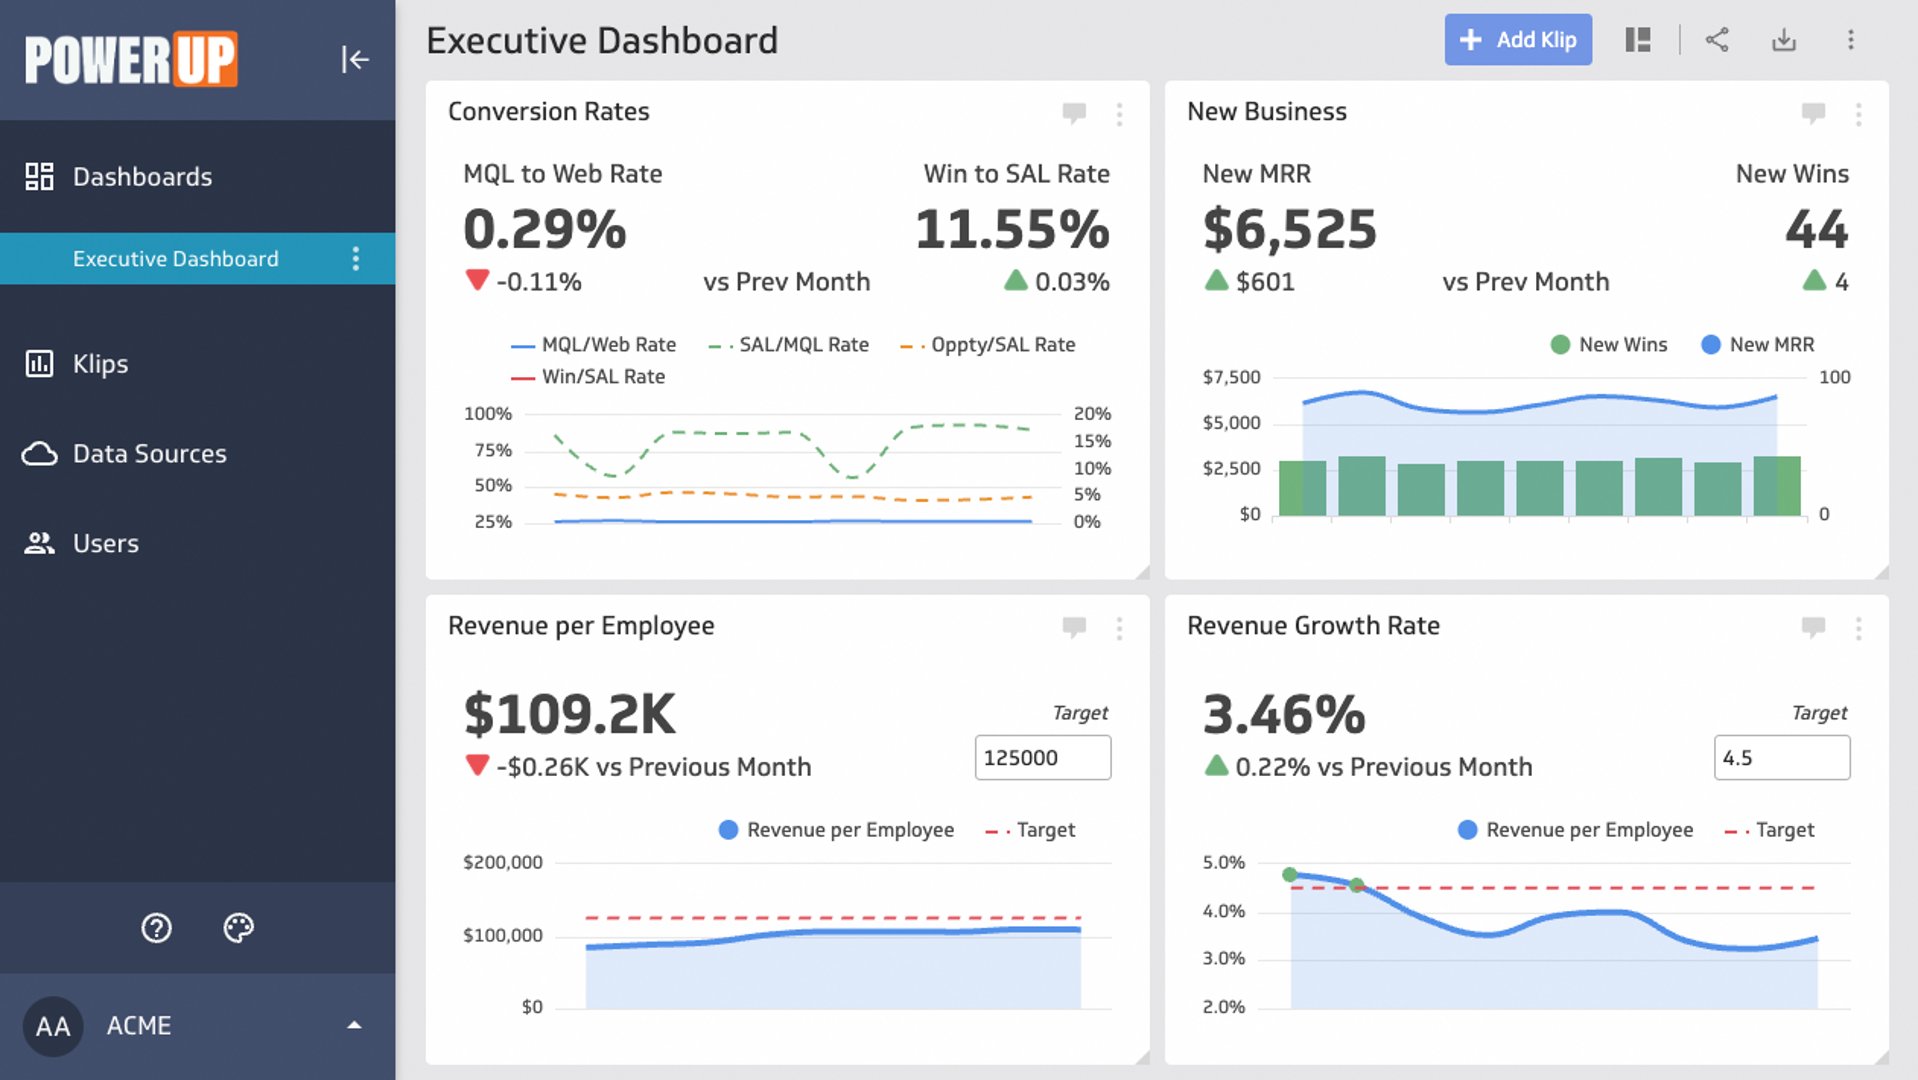
You’ve just acquired a new client - PowerUP Electrical - and want to set up an executive dashboard for them - a dashboard that you use for a number of your clients.
Step 1: Add them as a client
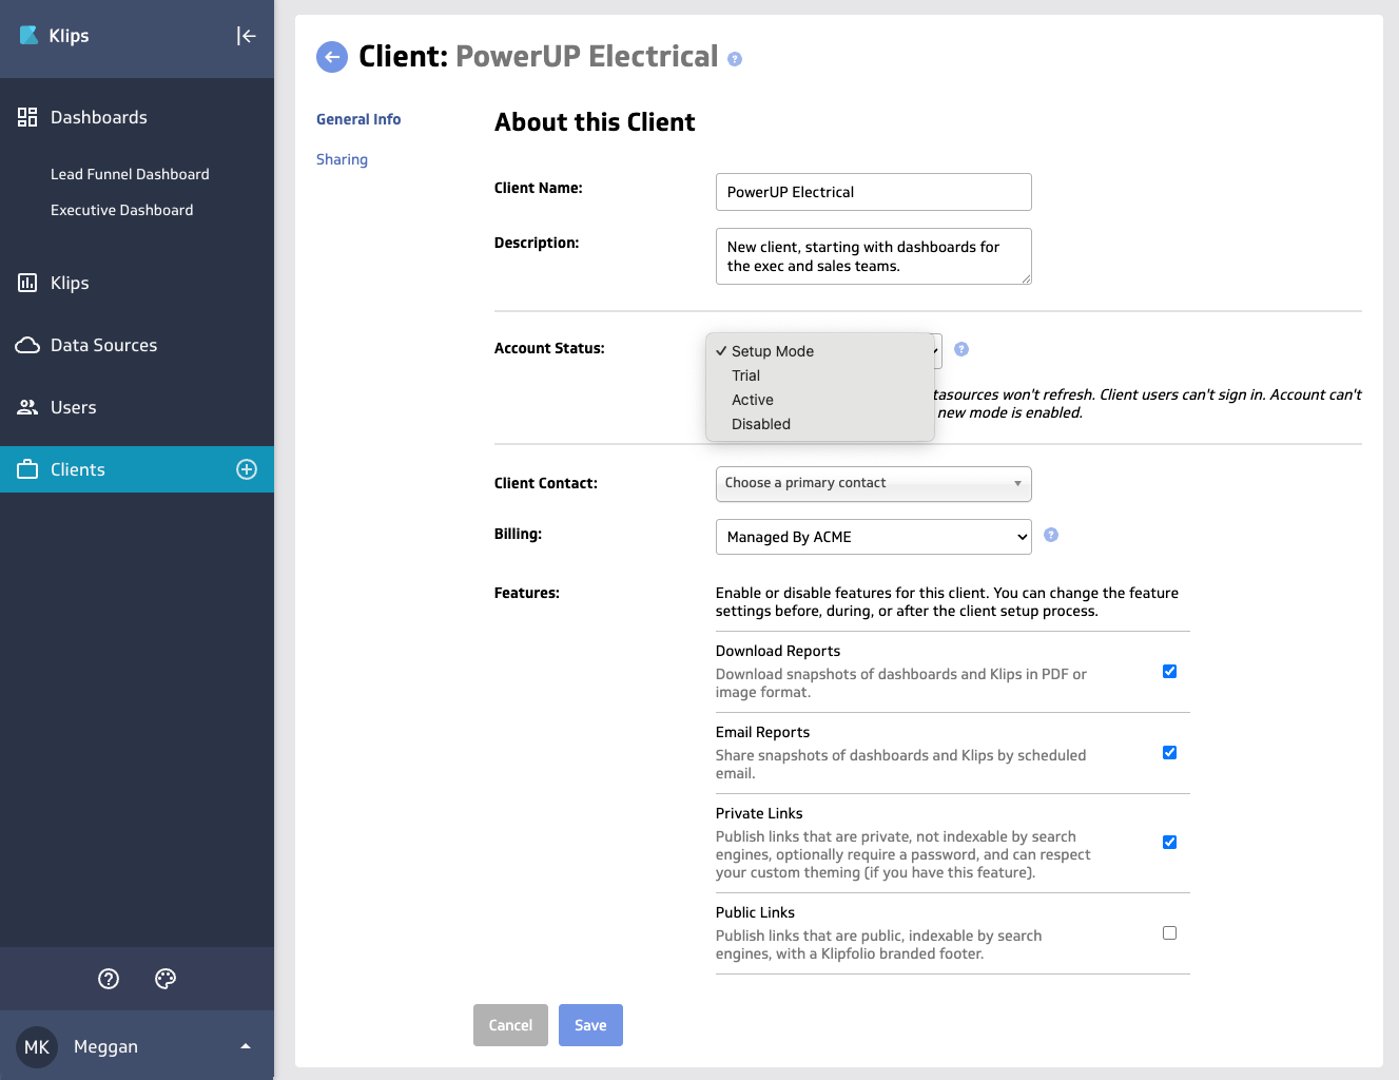
Sign in to your agency’s master account and go to the Clients section. This is where you manage, remove, and add clients. When adding a new client, keep the following in mind:
- Account Status: For Trial or Active, clients can sign in to their account. If you set the status to Setup Mode or Disabled, they cannot sign in.
- Sharing: The groups within your master account that have access to this client, including the ability to sign in to the client’s account as an administrator.
- Features: Enable or disable how the client's users can share assets - such as downloading reports, or publishing publicly accessible links.
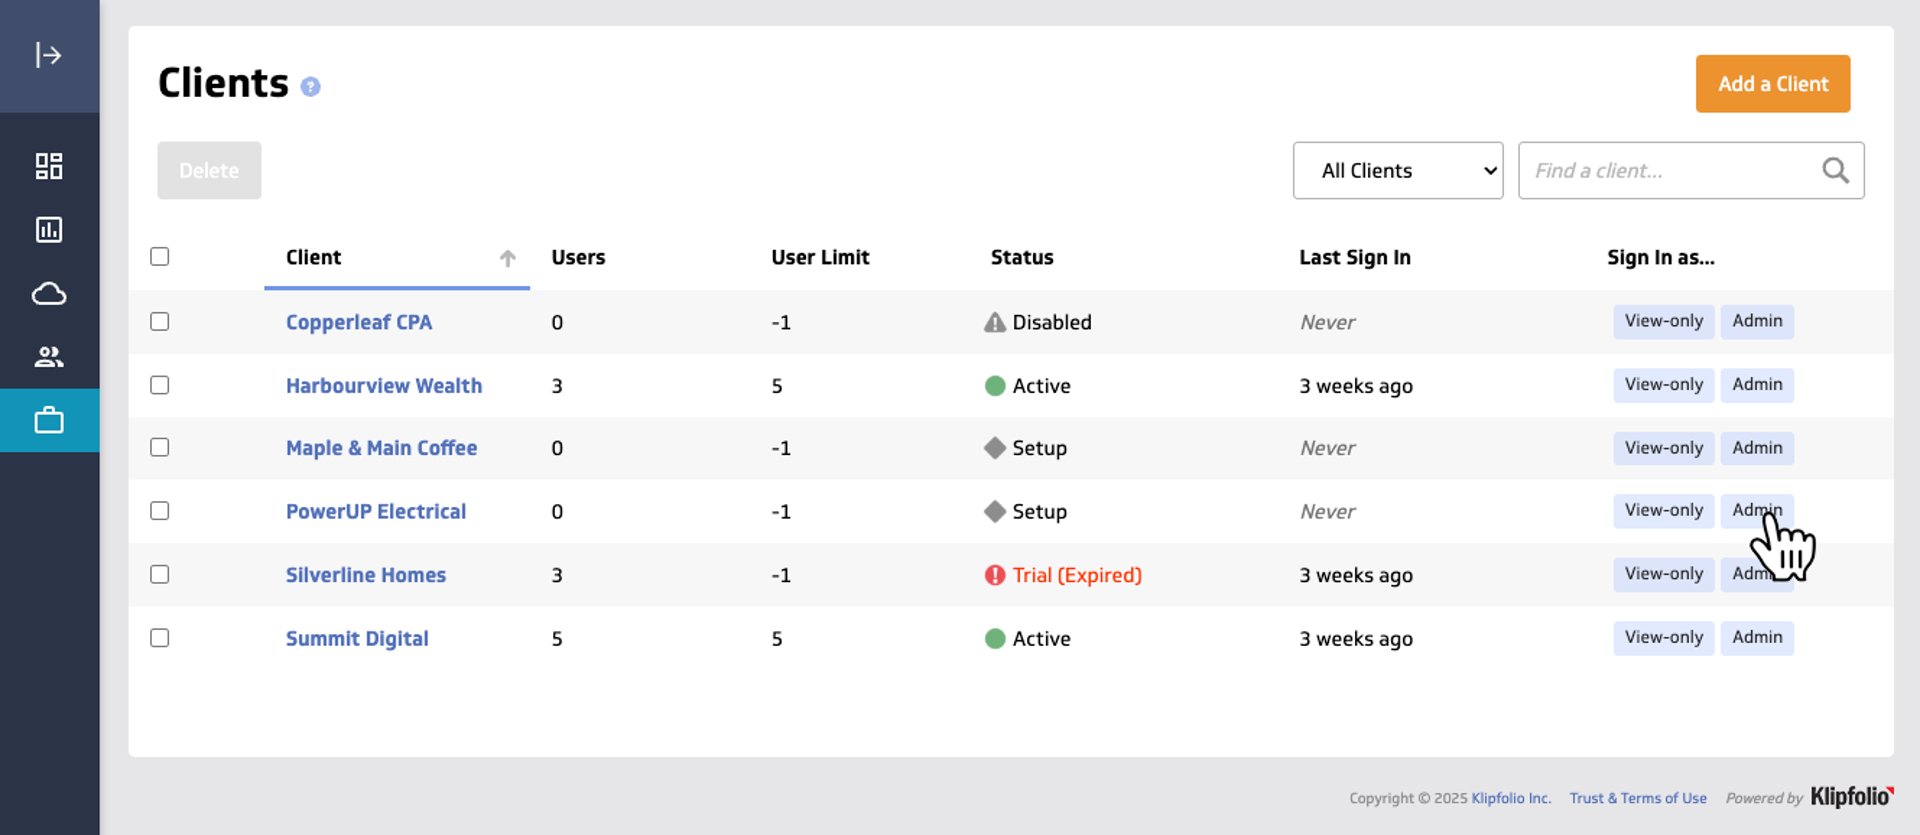
Step 2: Sign in to the client’s account
Sign in to the client’s account to complete the remaining steps. In the Clients section, choose to sign-in as an admin user.
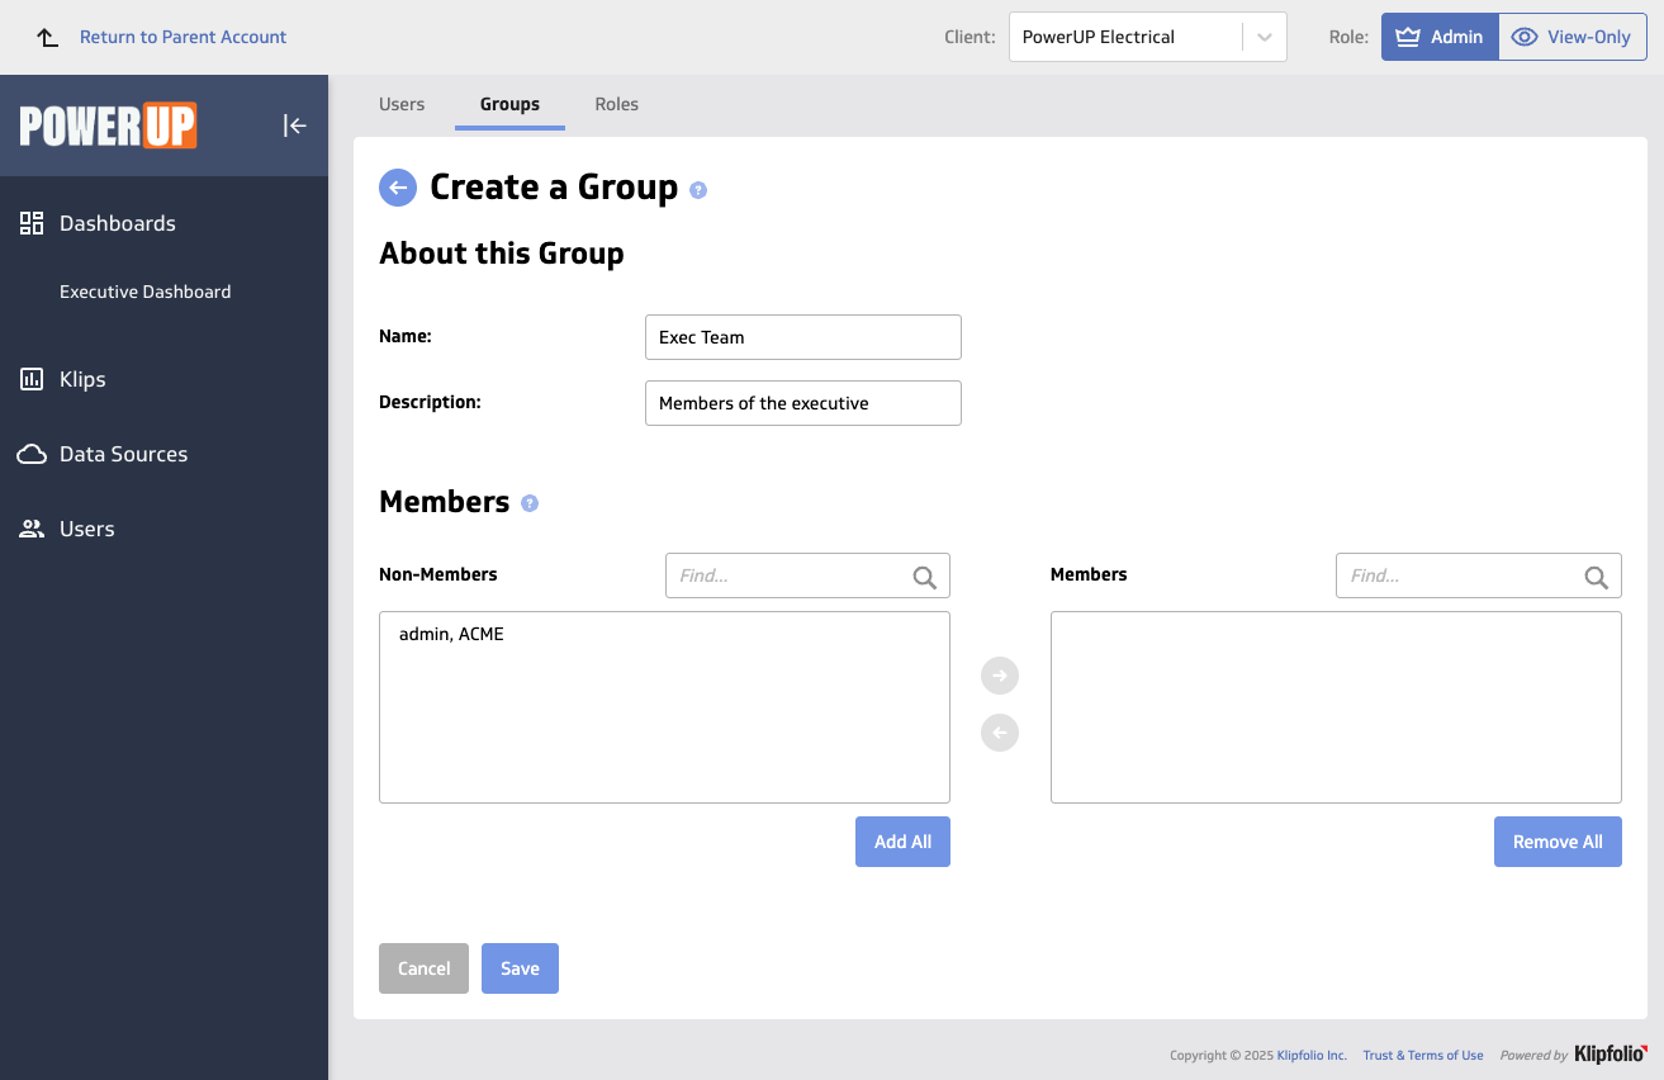
Step 3a: Create groups
Before adding users to the client’s account, it's a best-practice to create groups. Groups let you share Klips and tabs with the right users and limit what different users can access when they sign in to the dashboard. More information: Creating Groups
Step 3b: Add users
Users are the individual account holders who access the dashboards you create. Add users by providing a valid email address, then assign them to the appropriate group (see Step 3a). If the client status is set to disabled, users won’t be able to access the dashboard until you change the status to active. More information: Adding new users
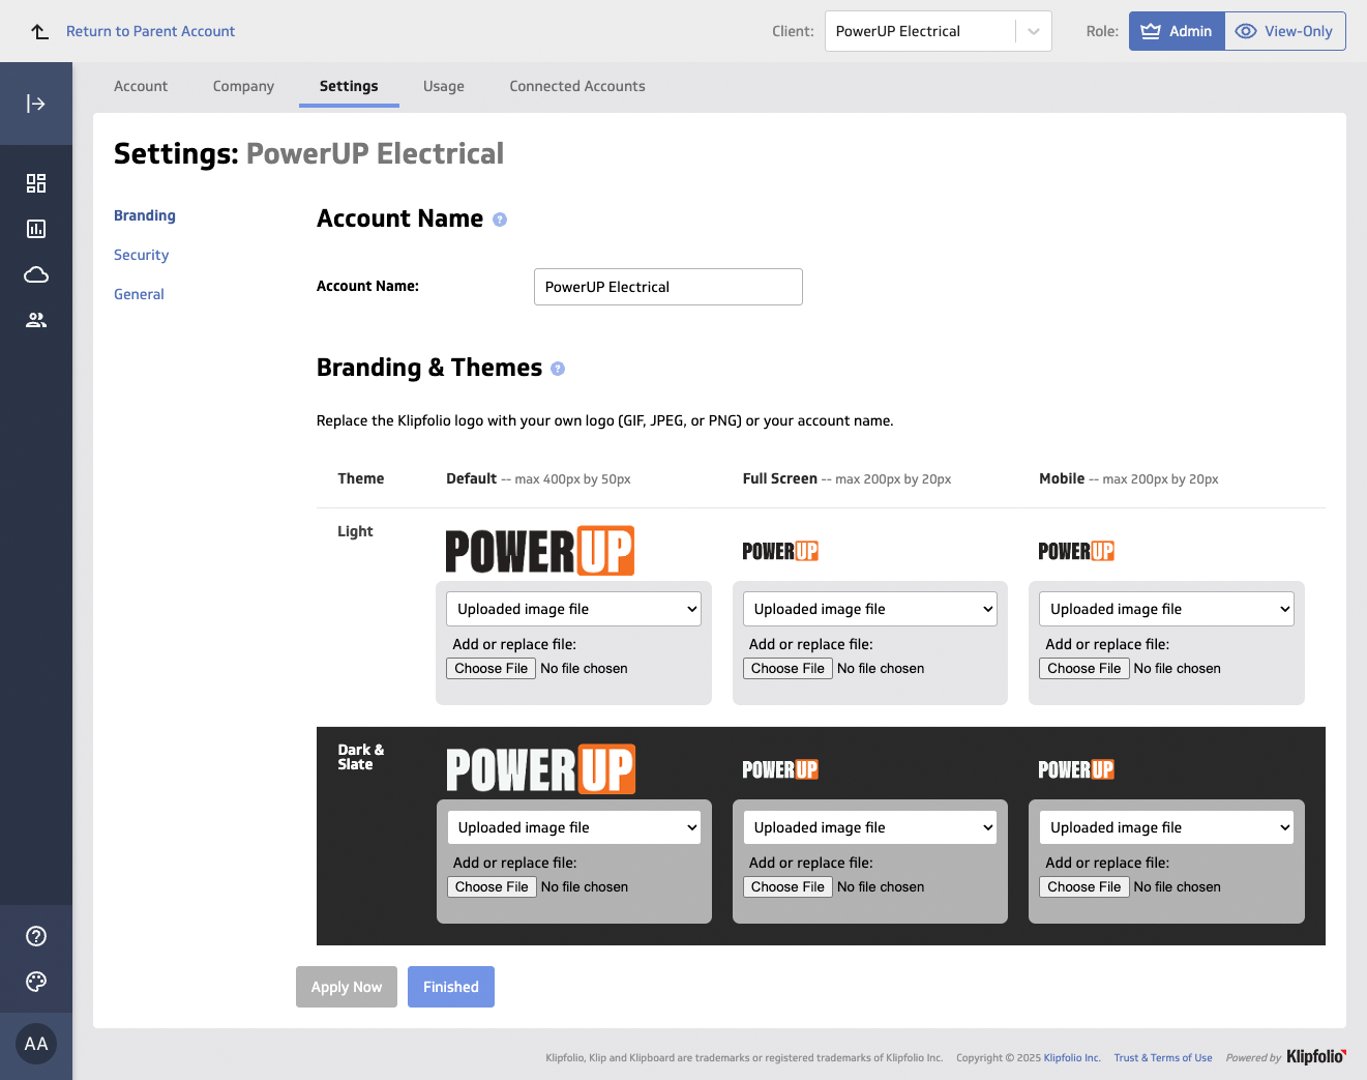
Step 4: Apply branding options
In addition to the white-label options available in your master account, you can brand the client’s dashboard - a simple way to really impress your client. You can specify logos for light and dark themes, as well as mobile and full screen mode.
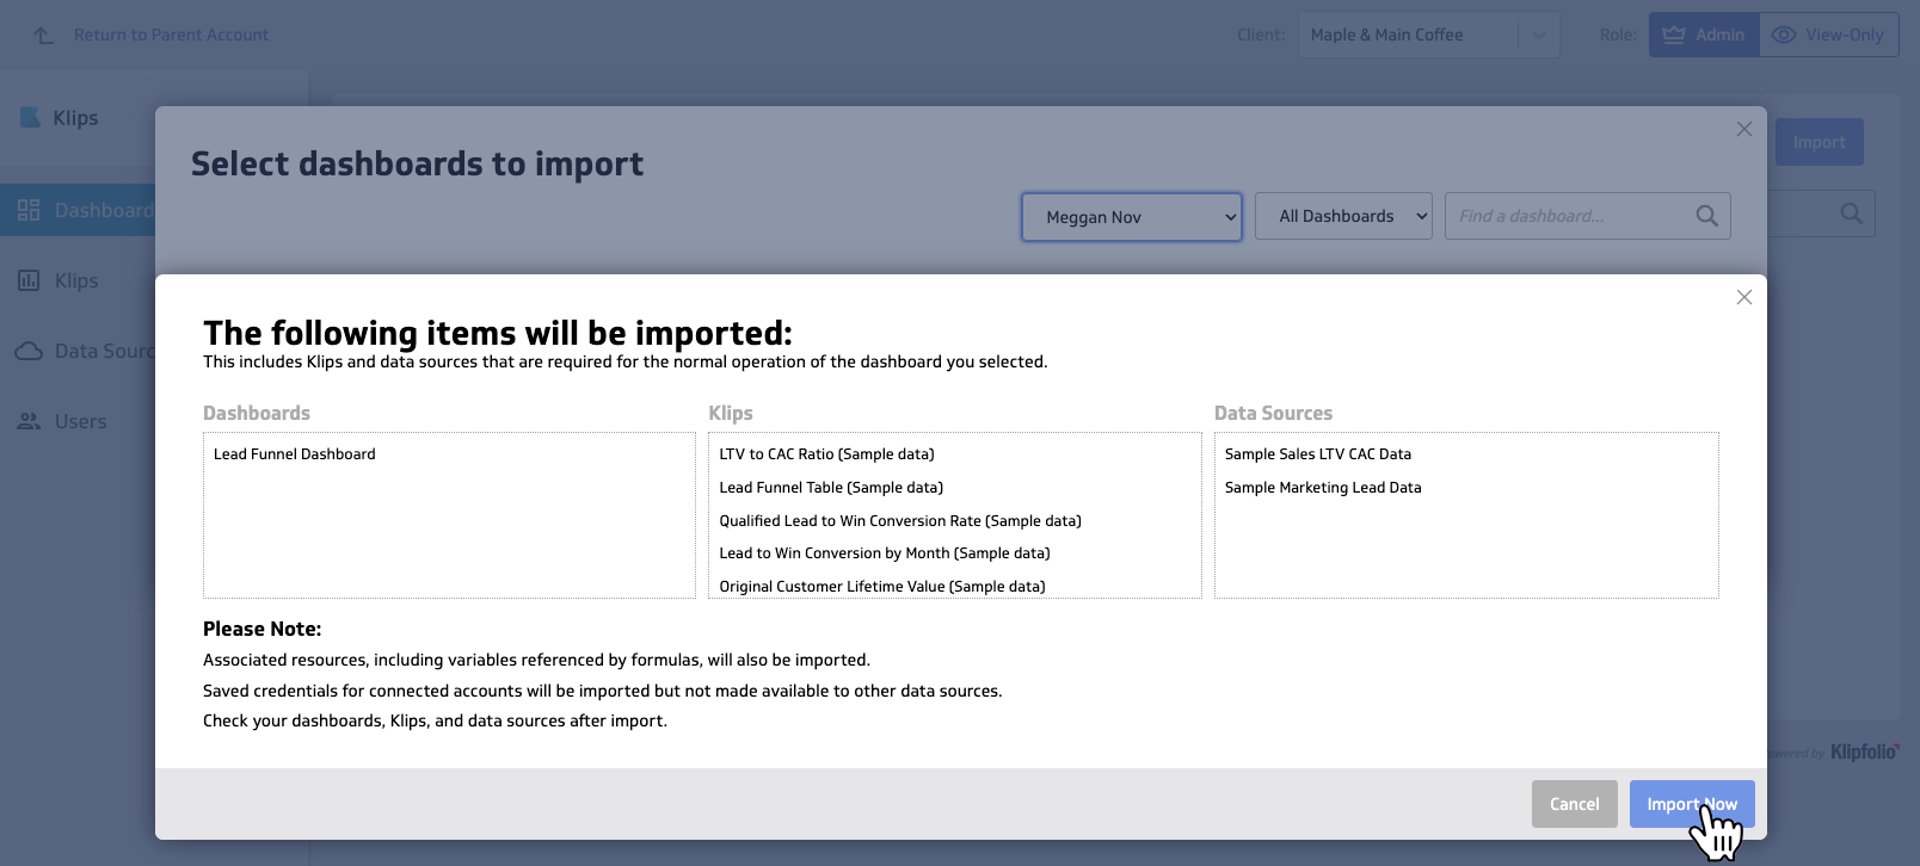
Step 5: Import Klips, dashboards, and data sources
The final step is to start building dashboards for your client. If you already have Klips, dashboards, and data sources associated with another account you manage, such as your master account, start by importing those assets. You can also create these assets within the client’s account. Don’t forget to share any imported resources with the relevant groups.
The last step...
Change the client’s account to active and ask for feedback on the dashboard!
Learn more
Interested in partnering with Klipfolio? Explore Klipfolio’s partner program to learn more.
Related Articles

6 Facebook ads reports every agency needs to attract and retain high-ticket clients
By Tanya Brody — April 10th, 2026
Klipfolio Partner How-To #1: Duplicating dashboards across client accounts
By Stef Reid — November 27th, 2025
Klipfolio Partner How-To #2: Company Properties can simplify client set-up
By Stef Reid — November 26th, 2025